How to Grow Weed
An Essential Step by Step Guide
There are a million reasons to grow weed, but the most popular ideas are to save money and to learn a new skill. Once you’ve made up your mind, the rabbit hole of growing cannabis is long and deep. Join us for an in-depth journey into the world of cannabis cultivation and how to grow weed.
How to Grow Weed Indoors
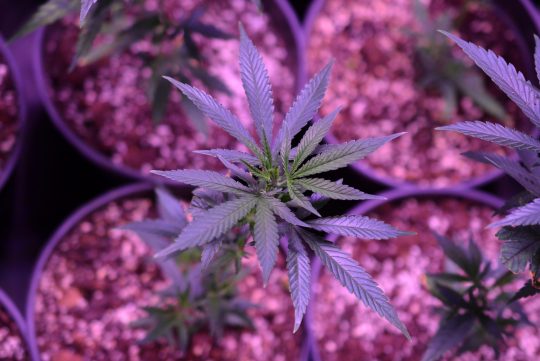
Growing weed indoors requires any amount of space – indoors. This can either be a small grow tent or a fully outfitted warehouse. When growing cannabis indoors, you’ll rely on the artificial environment that you provide.
Natural rainfall, sunlight, wind, and bugs will no longer factor into your concerns; however, your indoor environment will pose new issues that you’ll have to battle continuously.
Issues such as high temperatures and humidity pose a common threat to indoor cannabis plants. The same goes for low temperatures and humidity. In general, growers should aim for a comfortable 70-85 °F and 45-60% relative humidity.
It’s essential that you have a digital thermometer/hygrometer combination device that allows you to monitor your relative humidity and temperature throughout the day.
Growing weed indoors means you will supply all the nutrition, water, medium for growth, light, and even CO2. However, let’s start with the three most important factors when growing indoors: lighting, ventilation, and odor management.
Lighting
Lighting is one of the most important aspects when growing cannabis indoors. Aside from nutrition and water, light is converted by plants into usable energy. Photosynthesis is the necessary process that the vast majority of plants use to live.
With this in mind, the most popular types of light for indoor cannabis cultivation are HIDs and LEDs.
HIDs (High-Intensity Discharge) come in two types – metal halide (MH) and high-pressure sodium (HPS). Metal Halides are known for their blue/white light that’s ideal for the vegetative stage of growth.
Alternatively, HPS discharges an orange/red hue that’s reminiscent of dusk, which is normally used for the flowering phase.
HIDs are incredibly bright and are perfectly suited to indoor cannabis cultivation. Their sheer amount of wattage will allow your cannabis crop to bask in their light, but this comes at a cost.
Although HIDs are outrageously bright, they are very expensive to power month after month. Common wattages are 600-watts and 1,000-watts. This means that they draw 600 to 1,000-watts of power directly from the outlet.
Depending on electricity rates in your area, 1,000-watts of power per month on an 18/6 light schedule can range from $250-500+.
On top of an expensive electricity bill, HIDs produce a significant amount of heat. This heat exacerbates the problem of electricity by requiring additional AC to cool down your grow room.
If you allow your grow room to become too hot, then your cannabis crop will suffer.
Alternatively, LEDs emit far less light but reduce your electricity bill by half. Light-emitting diodes are much more efficient because they emit little to no heat, and last far longer than HID bulbs.
For most new growers, LEDs are an excellent trade-off because they will keep your electricity bills down while allowing you the ideal environment for focusing on growing your weed.
However, LEDs come at a cost, and they are normally much more expensive than HID grow light systems.
Furthermore, since LEDs emit very little heat, they can be placed far closer to the plant canopy. HIDs, on the other hand, require at least 12-20” between the base of the light and the top of the plant canopy.
If you decide to grow indoors, then your lighting system should be a primary concern. If you purchase an LED grow light system, then you’ll need to be ready for a high upfront cost.
If you choose a HID grow light system, then you’ll need to ensure your grow room has proper ventilation and cooling.
Ventilation
Ventilation is an absolute must when growing cannabis indoors. If you think that providing ample light will keep your marijuana plant satisfied – think again.
Photosynthesis is the process of converting carbon dioxide and water into usable energy – therefore, you need a constant supply of air.
Luckily, there is a wide range of tools to outfit your ventilation system. Squirrel fans, inline fans, oscillating fans, clip fans, stationary fans, and even PC fans are used to simulate wind inside enclosed spaces.
It’s essential to pull fresh air from an outside source and bring it directly to your cannabis crop. Additionally, it’s necessary to then remove hot air from the grow room to the outside.
The only way to complete this process of give-and-take is by building an efficient ventilation system.
In general, the layout is thus: an inline fan feeds fresh air into ducts, which leads into the grow room. The lighting and fresh air give the necessary components for cannabis plants to photosynthesize.
Once the process is complete, oxygen is emitted. However, this process comes at the cost of heat.
As the hot air rises, your grow rooms’ temperature begins to increase. It’s now your out-take system’s task to remove the hot air. Typically, you’ll connect your carbon filter to your exhaust fan (inline fan), and this will travel through ducting.
Your out-take ventilation system should route all hot air to the outside.
Although it sounds simple, the layout of your grow room will dictate how easy or difficult your ventilation system will be to create. It’s for this reason that the most ideal growing space is one that has easy access to windows, ducts, or an attic.
Odor Management
Even if you live in a state that allows recreational cannabis, not all of us want our business to be known – or smelled. This is where odor management comes in, and when you’re learning how to grow weed, this subject is usually glossed over.
Carbon filters are large metal tubes filled with activated virgin carbon pellets. When an odor or any type of impurity passes over the bed of carbon, a chemical reaction known as adsorption occurs.
This reaction latches onto the pungent odor that marijuana plants produce, which helps to keep your grow room from smelling like a dead skunk.
The primary way to make sure your carbon filter works properly is by attaching an inline fan to it. A carbon filter and inline fan combo are the two main components of an out-take ventilation system that we discussed in the previous section.
As the inline fan pulls air through the carbon filter, all unwanted odors will be dragged along through the bed of activated carbon.
If you require discretion while growing cannabis, carbon filters are an absolute necessity.
How to Grow Cannabis Outdoors
Nothing beats learning how to grow weed outdoors. Looking up at a 9’ tall cannabis plant that’s growing to its absolute potential is one of the best feelings there is.
You won’t need to worry about electricity bills because the sun has more than enough lumens to power photosynthesis.
However, you will need to worry about many other things, such as pests (deer, gophers, rabbits, predatory insects), mold, fungi, wind, temperature, rainfall, snow, frost, and much more.
Growing cannabis outdoors allows you to take advantage of the free nutrients of the soil and the limitless power of the sun. However, growing marijuana outdoors isn’t a cakewalk.
Let’s take a look at what you need to know if you want to know how to grow weed outdoors.
Pest, Bacteria, and Fungal Control
When growing weed outdoors, you’re definitely going to run into problems with pests, bacteria, and fungi.
However, it’s very dangerous to use systemic chemicals to battle any of these invasive issues. You’ll come to find out how hopeless it feels when you find your cannabis crop covered in insects or fungi.
However, it’s better to allow your crop to die than spray it with harmful chemicals that you (or someone else) will eventually consume.
Due to this, it’s best to use organic-based controls, such as neem oil, Serenade, calcium silicate, copper sulfate, and MycoStop. Depending on your issue, all of these methods are suitable for use on consumable crops.
In regards to animals, such as deer, rabbits, and gophers – it’s best to construct a fence that deters these cute but dangerous animals. If you don’t provide any type of barrier, it’s unlikely that your crop will survive.
Human Theft
It’s a shame that we have to discuss this at all, but it does happen. I’ve come across countless growers who’ve put in literally months of their time and money, only to get ripped off near harvest time.
Theft has always been common among outdoor growers because it’s more difficult to protect your crop than compared to indoor grow operations.
Cannabis thieves come at night, and their sole goal is to chop down your flowers before your official harvest time.
The worst part about cannabis thieves are that they steal harvests that are roughly 1-month premature. This means that they are stealing weed that isn’t close to being ready, but they will still try to sell it on the black market.
When growing outdoors, a secure perimeter that includes a heavy-duty fence and night vision cameras might be your best bet when combatting thieves.
Container Sizing
You won’t (or can’t) use the soil that’s on your property, then it’s best to use containers and purchase potting soil.
For most outdoor growers, it’s best to use anything from 10 to 100-gallon containers. When you use large containers, you won’t need to worry about your cannabis plants becoming root-bound.
If you begin growing your crop in May, you’re looking at 3-4 months of the vegetative cycle.
It’s incredible how fast cannabis plants turn into trees, and you can only imagine how large their root system grows. Due to this, it’s essential to give them a lot of space to branch out.
So, this leads us to our next question. Do you want massive cannabis trees that can literally yield pounds, or are you looking for something a tad bit more manageable?
If you don’t want a cannabis tree, then you should push your planting date to June or even July. By doing so, your plants won’t have enough time to get too out of hand.
Cannabis Plant pH
Now that we’ve gone through the ins and outs of growing weed indoors and outdoors – let’s talk about pH.
pH is a scale that tells growers how acidic or basic their nutrient solution or water is. Although this may bring back traumatic memories of chemistry 101, it’s much more straightforward than you think.
Medium ⇒ Hydroponics ⇒ pH ⇒ 5.2 – 5.8
Medium ⇒ Soil ⇒ pH ⇒ 6.2 – 6.8
When in doubt, check this chart out. It looks easy because it is easy. If you’re growing cannabis plants inside Rockwool, then make sure your nutrient solution tests between 5.2 – 5.8. If you’re growing in soil, then 6.2 – 6.8 is the optimal range.
You’ll need to invest in a standard pH meter, which will give you a digital readout once you place the probe into water or nutrient solution.
When you first purchase a pH meter, you’ll need to calibrate it to ensure that it’s providing correct values. Calibrating is a breeze and requires three calibration solutions. These three calibration solutions are pH 7, 4, and 9.
These calibration solutions come in their own sachet and are pre-tested to ensure their values. As you check each pH on your meter, you can verify that it’s on point.
However, if your pH meter reads different values than 7, 9, or 4, then you will have to calibrate the device until it shows the correct numbers manually. Once your pH meter is calibrated, you’re ready to start feeding your plants.
Cannabis Nutrition
Plant nutrition is the cornerstone of all crops. Aside from water and light, the nutrients that plant roots uptake are essential for growth, flower production, and their overall plant health.
When given too much nutrition, your crop will show signs of what’s known as nutrient burn. When given too little, plants respond by showing a variety of symptoms that represent a deficiency. It’s this fine balance that all growers must experience when cultivating cannabis.
As you begin your adventure into growing weed, you’ll notice a wide range of nutrient brands. Some will tell you that their nutrients are cannabis-specific.
Others will tell you that you’ll have the largest harvest you’ve ever seen. Always remember that it’s the grower that’s responsible for the plants’ wellbeing – not the nutrient brand.
Each nutrient brand that you purchase will have three big letters with an attached number next to them. N-P-K stands for nitrogen, phosphorus, and potassium, which are the big three macronutrients.
However, don’t get too caught up on these three macronutrients because there are other vital nutrients, as well as essential micronutrients.
Each nutrient plays a vital role in your cannabis crop, from protecting cell walls to increase flower production. Due to this, a well-balanced nutrient solution is essential for the well-being of your marijuana crop.
Take a look at this chart when searching for the proper nutrients for your cannabis crop. It’s always important to remember that all nutrients are needed in moderation.
Macronutrients –
- Nitrogen (N)
- Phosphorous (P)
- Potassium (K)
- Calcium (Ca)
- Carbon (C)
- Hydrogen (H)
- Magnesium (Mg)
- Sulfur (S)
- Oxygen (O)
Micronutrients –
- Manganese (Mn)
- Iron (Fe)
- Silicone (Si)
- Sodium (S)
- Cobalt (Co)
- Nickel (Ni)
- Chlorine (Cl)
- Zinc (Zn)
- Copper (Cu)
- Molybdenum (Mo)
- Boron (B)
Water Retention
Regardless if you grow in hydroponic systems or in soil, you’ll need to understand water retention when learning how to grow weed.
Water retention is the length of time that water stays within a given medium. It doesn’t really apply to true hydroponics, such as ebb-and-flow or deep-water-culture systems (DWC), since the root ball is always immersed in water.
However, when growing in Rockwool, clay pellets, soil, vermiculite, coco coir, and perlite – you will deal with differing water retention characteristics.
Soil that has a consistency of beach sand has very low water retention because the granules of sand are too large. Clay-like soil holds water too tight because of its incredibly small granules of silt and dust.
In general, you want to find something in between too large and too fine because you want to find an ideal level of water retention.
You may be asking yourself – what’s wrong with a medium that holds water really well? The answer is that plant roots need to breathe, and without air pockets, they are prone to rot from bacteria.
Rockwool, clay pellets, coco coir, vermiculite, bark, and perlite are excellent as stand-alone mediums or additives to the soil.
When using hydroponic-based methods, the medium is continuously saturated in nutrient solution because it dries quickly.
Soil, on the other hand, is perfect as a stand-alone medium as long as it drains relatively quickly. The perfect type of soil is known as “loam soil” and it’s neither clay nor sand.
However, not all of us are lucky enough to have loamy soil in our backyards. By mixing perlite, clay pellets, and bark into the soil that’s dominant in clay will yield a soil that drains quickly.
Alternatively, if your soil drains too fast, then an amendment of vermiculite will slow it down due to its water-retaining ability.
We’re not going to get into soil or hydroponic mixes because there are too many variabilities when it comes to a cultivators’ location.
If you live in a hot region that has low humidity, then your soil mix will need certain aspects that differ from a grower in a cold climate that experiences high amounts of rainfall.
Your location’s weather is a prime concern when deciding on mix mixes to enhance or decrease water retention.
Cannabis Techniques
When you’re ready to grow cannabis, it’s best to know which cannabis growth technique you’ll utilize for your cannabis plants. By knowing this, you can use these various methods that fit ideally with your grow room.
SOG
The Sea of Green (SOG) technique is a cannabis classic because it allows growers to grow a multitude of plants in a small area.
This method requires cannabis strains that do not grow tall, branch out or are prone to mold or fungi. The reason behind this is because this method requires plants to be crammed together in close quarters.
The idea behind SOG-style growing is to focus all the light on the upper-most section of your plant – also known as the apex. The apex of the cannabis plants typically produces the largest bud.
By focusing on the apex, growers can cultivate many plants under a single light for a large harvest.
SCROG
The Screen of Green technique is meant for large plants that wildly branch out. It’s also a method for cultivators in small spaces that want to grow large plants – but need a technique to keep them under control.
The foundation of a SCROG setup is the trellis or netting that’s built around the plant. Depending on how large your plant will be, the netting is placed between 1-2-feet above the plant canopy.
As the cannabis plant grows upward, your job is to tuck branches into the netting until you create a crown effect. This method spreads the canopy out, which allows light to penetrate all of the bud sites.
It also keeps large plants in check because you must bend the branches when you tuck them into the netting. This method is also ideal for growers that are limited to their plant count because it enables large yields from medium to big plants.
LST
Low-Stress Training is a method that tames large plants by using string. As a plant grows, the cultivator’s job is to use a piece of string and tie it to the uppermost node of a cannabis plant.
The other end of the string is tied to the container in a pre-drilled hole. As you slowly bend the plant, tie it down. After a few days, you’ll notice that the side that’s exposed to the light is beginning to take on the apical dominance. The idea behind this is to expose a wide variety of bud sites to light – thereby increasing your final yield.
Low-Stress Training is also perfect for keeping plants low to the ground, which is ideal for guerilla growers and indoor growers with little space. This method can be done over and over until you are satisfied with the number of nodes and bud sites.
Super Cropping
Super Cropping is for growers that want a monster yield. This technique is suited towards large cannabis strains but can be used with medium-sized plants as well.
Super Cropping requires growers to crush a plant’s node. Once crushed, the plant is left to heal on its own. Over the course of a few days, the plant grows what’s known as a callus. Above the callus, multiple branches grow out of a single branch.
Ultimately, Super Cropping is meant to create a plethora of new branches/nodes where flowers will eventually grow from. The callus acts as ultra-strong support that will handle the weight of an abundant yield.
Growing Cannabis in Soil
Now that you understand cannabis growing styles, it’s time to learn how to grow cannabis in soil. This is by far the easiest method for growing weed, as well as being the most beginner-friendly.
Most soil-based growers don’t need to use expensive pH and EC meter, which is another bonus to growing cannabis in soil. When you learn how to grow marijuana in soil, you’ll quickly find out that everything that your plant eats should be inside the soil.
Instead of fussing with nutrient concentrates that need to be pH’d and mixed – the soil should have everything already. This is why it’s best to grow in organic-based soils that contain a variety of fertilizers, such as bat guano, worm castings, dolomite lime, compost, and bone meal. You’ll find that when mixed correctly, you can grow an entire plant’s life cycle in a single soil-mix without additives.
The best way to ensure a pH-neutral grow is to add a hefty amount of dolomite lime. This crushed mineral offers a buffer, which means you won’t need to worry about wild pH swings during your grow.
Additionally, soil-based grows are compatible with mycorrhizae and beneficial bacteria. Mycorrhizae attach to plant roots and increase their surface area for nutrient uptake.
Mycorrhizae also break down unusable forms of nutrients into usable forms. Beneficial bacteria are used to increase the immune system of plants and guard against rogue strains of bacteria. Mycorrhizae and beneficial bacteria offer a symbiotic relationship to cannabis plants – making them indispensable tools when growing in soil-based systems.
Growing Cannabis from Seed
Cannabis seeds are an awesome way to discover new and exciting flavors, aromas, and effects. They also allow growers the ability to create their own strains at home, which means they’ll never have to purchase marijuana seeds again.
Cannabis seeds are very easy to germinate – especially when following this brief guide:
- Step One
Purchase root cubes, such as Rapid Rooter, along with a tray and dome.
- Step Two
Drop a single cannabis seed in the pre-made hole in the Rapid Rooter. If you’d like, tear off a small piece of the Rapid Rooter and gently cover the hole.
- Step Three
Gently water each rooting cube until it’s noticeably saturated. During this initial watering, you can opt to use products that contain vitamins and hormones for increased germination rates.
- Step Four
Check the rooting cubes hourly to ensure that they do not dry out. If your cubes dry out while the seeds are germinating, they can die or become irreparably damaged. If the cube is no longer saturated, feel free to water it again.
- Step Five
After 3-6 days, your cannabis seeds will germinate (if they are viable). Allow the seeds to break through on their own. Do not remove the seed casing on your own, as this may damage the cotyledons.
- Step Six
Immediately place all seedlings under an LED, low-wattage HID (150-watts), or a CFL bulb. This will prevent the stems from becoming “leggy” and weak.
Each seedling will show leaf-like cotyledons that are filled with nutrition to feed the seedlings over the course of the next few days.
- Step Seven
Transplant all seedlings into small containers – gently. Remember, this is the beginning of your seedlings’ life, and they need the best care to ensure a bumper crop harvest in the future.
Weed Plant Stages
Juvenile Stage
After the seedling stage, the cannabis plant enters the juvenile stage. During this phase, you’ll notice that the plant produces true leaves and 2-3 new sets of nodes. By this point, the root system is likely as large as the plant itself.
Vegetative Stage
The vegetative phase is critical because this stage promotes accelerated growth. The overall size of your cannabis crop depends on how long you leave your plant in the vegetative stage.
Remember, cannabis plants will stay in the vegetative phase for decades if given an 18/6 light schedule. During the vegetative stage, it’s important to feed a higher dosage of nitrogen compared to other nutrients, such as phosphorus. The reason behind this is because nitrogen is the primary nutrient for foliar growth.
As the name implies, the vegetative stage allows the cannabis plant to push out node after node, along with green foliage. It’s important to monitor the growth, as your plant may become too large during the flowering stage.
Furthermore, depending on how long the vegetative period lasts, growers will find out the sex of their cannabis plants. Cannabis plants show their sex when they reach sexual maturity, which means you’ll know if you have a room full of females or a room full of males. If you’re cultivating cannabis for flowers, then you must discard all males from the room at this point.
Pre-Flowering Stage
The pre-flowering stage is the result of the light schedule moving from 18/6 to 12/12. Within 48-hours, you’ll notice your plants grow rapidly. This is known as the pre-flowering stage or the stretch stage.
Cultivators call this the stretch because the cannabis plant (depending on strain) literally stretches up to 200%. This means if you left a cannabis plant in the vegetative stage until it was 3-feet tall, by the end of its’ stretch, it might be 6-feet tall. This is why you must understand how tall or large you want your plants to be at the end of flowering.
It’s essential to inspect each cannabis plant to ensure that each pre-flower exhibits female flowers. If you find male flowers, it’s necessary to discard them before they release any pollen into your grow room. Even feminized seeds aren’t guaranteed to be females 100% of the time. This is why it’s important to remain vigilant until you harvest your crop.
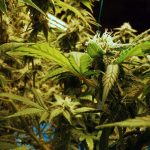
Flowering Stage
This is the stage that all cannabis growers look forward to. Once cannabis plants enter the flowering stage, the entire process may last between 6-14 weeks. Fast flowering marijuana strains typically take 6-8-weeks of flowering, whereas landrace Sativas can take up to 16-weeks to complete their flowering stage.
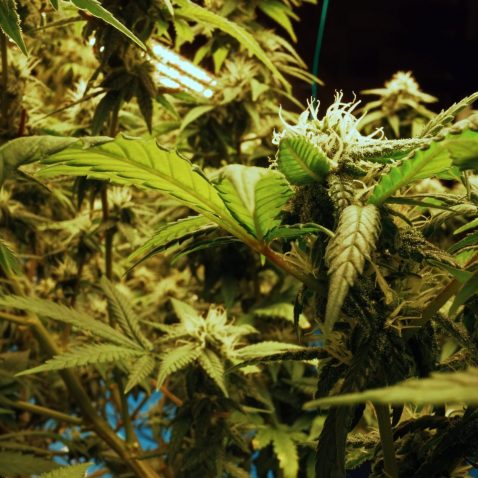
During this stage, you’ll notice that your plants have stopped stretching and begun to produce small bud sites. As the days pass by, these bud sites will become enveloped by white hairs and small leaves.
By the 4th week, you’ll notice that the flowers are beginning to swell with trichomes, as well as an intense aroma. It’s important to monitor your plants constantly to ensure against hermaphrodites in the garden.
Whether you’re growing from cannabis seed or clone, you should know how long your specific strains flower for. If a certain cannabis strain flowers in 8-weeks, then you should be prepared to harvest by the 8-week mark.
At this point, all of your hard work will finally pay off.
Summary
Cannabis cultivation is not an easy process and requires a lot of dedication and attention to detail. These steps provide only a basic overview of what it takes to grow cannabis plants successfully.
However, there is a vast amount of knowledge and skill required to produce high-quality cannabis products consistently. Factors such as humidity, temperature, soil pH, and water quality all play a crucial role in cultivating high-quality cannabis.
With time, patience, and experience, you can become a successful and knowledgeable cannabis cultivator.
Share the Love
If you found this post useful, please let others know about it by sharing it.